
Master the Art of Applying Brick Paver Joint Filler Like a Pro

Choose the Right Brick Paver Joint Filler for a Stronger Surface
The best brick paver joint filler depends on the paver material, joint width, drainage, and expected traffic. For most concrete paver patios and walkways, polymeric sand is a practical choice because it locks joints more firmly than plain sand and helps limit weeds, insects, and rain washout. For wide joints, heavy loads, or highly permeable paving systems, a water-permeable resin mortar may be the better fit.
Before choosing and applying filler:
- Measure the joint width and check the product’s approved range.
- Match the filler to the paver type and base drainage.
- Remove failed sand, weeds, and debris to the needed depth.
- Apply only to a clean, dry surface unless the product specifically allows wet installation.
- Follow the manufacturer’s watering and cure-time instructions exactly.
Good joint filler does more than make a patio look finished. It supports paver interlock, reduces shifting and trip hazards, keeps debris from collecting in gaps, and helps the surface stand up to Bay Area weather and everyday use.
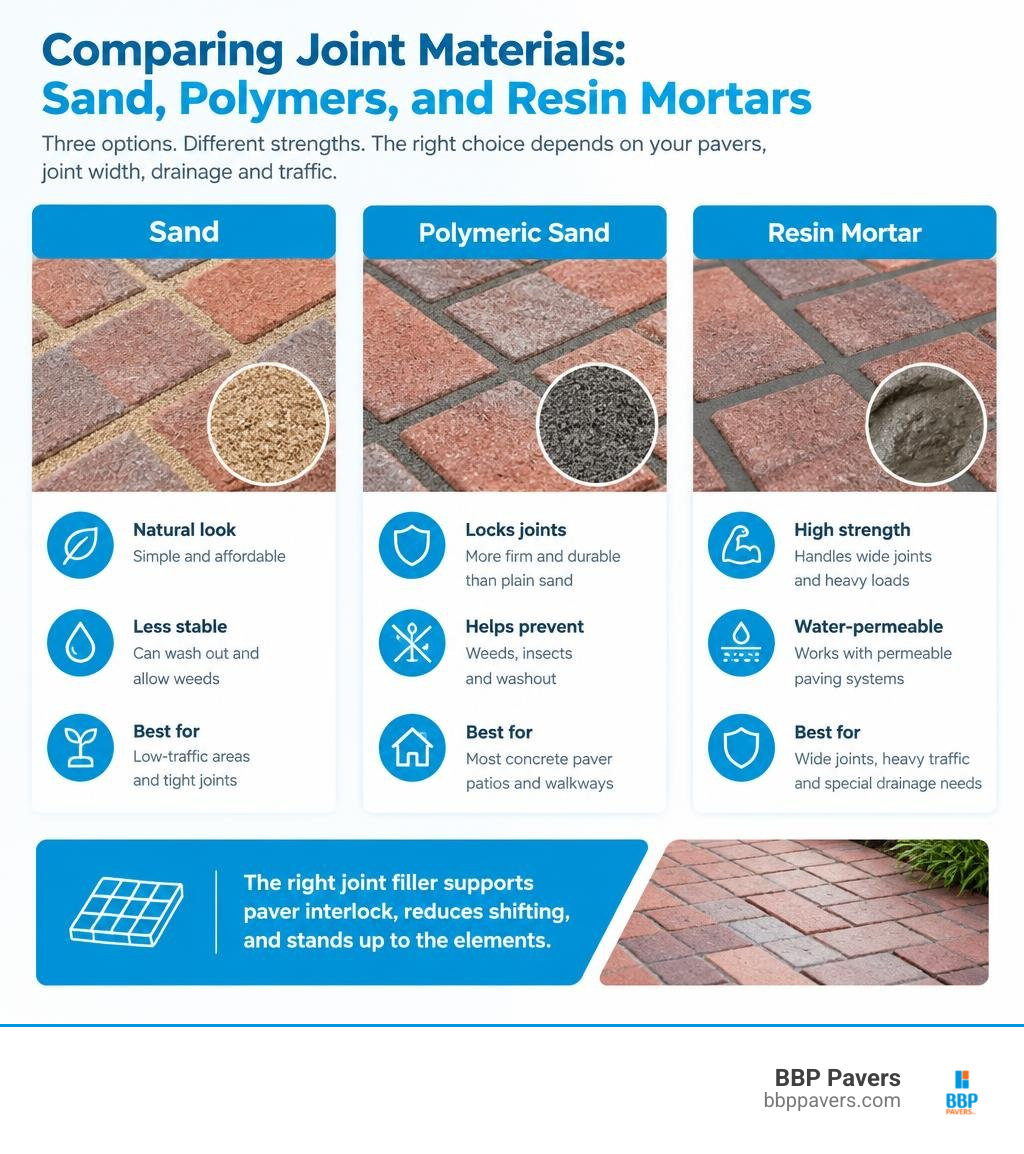
Know your brick paver joint filler terms:
Comparing Joint Materials: Sand, Polymers, and Resin Mortars
Every paver installation relies on frictional interlock. Without material bridging the gaps between individual units, segmental pavements lose their load-spreading capacity, allowing pavers to shift, tilt, and heave under routine foot and vehicular traffic. Selecting the right compound is crucial for the longevity of your hardscape.
| Feature / Metric | Traditional Joint Sand (ASTM C144) | Polymeric Sand | Pre-Mixed Resin Mortar |
|---|---|---|---|
| Primary Binder | None (unbound silica/masonry sand) | Polymer additives & dry adhesives | Synthetic resins (oxygen-cured) |
| Typical Joint Width | 1/16″ to 3/16″ (tight joints) | 1/16″ to 2″ (depending on grade) | 3/16″ (5 mm) to 2″+ |
| Permeability | High (initial), prone to clogging | Low to semi-permeable | Permanently air & water-permeable |
| Washout Resistance | Low (washes out in heavy rain) | High (once fully cured) | Extremely high |
| Weed & Insect Deterrence | Poor (requires frequent maintenance) | Strong (forms an impenetrable crust) | Maximum (rock-hard barrier) |
| Installation Weather | Dry weather only | Completely dry surface required | Dry or wet/light rain conditions |
| Cure Time | Immediate (no chemical cure) | 24 hrs (pedestrian) / 72 hrs (vehicles) | 24 hrs (pedestrian) / 6 days (traffic) |
| Load Capacity | Light to moderate | Moderate to heavy residential | Heavy (up to 3.5 tonnes or more) |
Traditional Sand vs. Polymeric Sand
Traditional sand, conforming to ASTM C144 standards, has been used in hardscaping for centuries. It relies strictly on grain angularity to wedge between paver edges. However, unbound sand is vulnerable to wind erosion, stormwater washout, burrowing insects, and weed germination. Over time, losing sand compromises the installation, creating shifting stones and dangerous tripping hazards. To avoid these issues, steering clear of common paver installation mistakes during the initial build is critical.
In contrast, high-performance formulations like weed-blocker paver locking sand combine clean, graded sand with water-activated polymer binders. When misted with water, these polymers dissolve, coat the sand particles, and cure into a flexible, elastomeric matrix. This locked joint resists erosion while flexing naturally under freeze-thaw cycles and ground settling, increasing joint stability significantly over plain sand.
Pre-Mixed Resin Mortar as a Brick Paver Joint Filler
Pre-mixed, vacuum-packed joint mortars represent modern hardscape engineering. Unlike polymeric sands that require completely dry conditions, these 1-component resin compounds cure upon exposure to atmospheric oxygen.
Because they can be washed into joints with water and squeegees, resin mortars allow for installation even during damp weather or light rain. They provide self-compacting properties, high compressive strengths (often exceeding 10 N/mm²), and water permeability rates around 12 L/m²/min. This makes them an exceptional solution for permeable bases, natural stone, and driveways handling traffic loads up to 3.5 tonnes.
Choosing the Right Brick Paver Joint Filler for Your Landscape
Selecting the ideal joint filler requires balancing aesthetics, environmental exposure, and site geometry. A joint compound that thrives on an open-graded backyard patio might fail rapidly on a heavily trafficked driveway if chosen incorrectly.
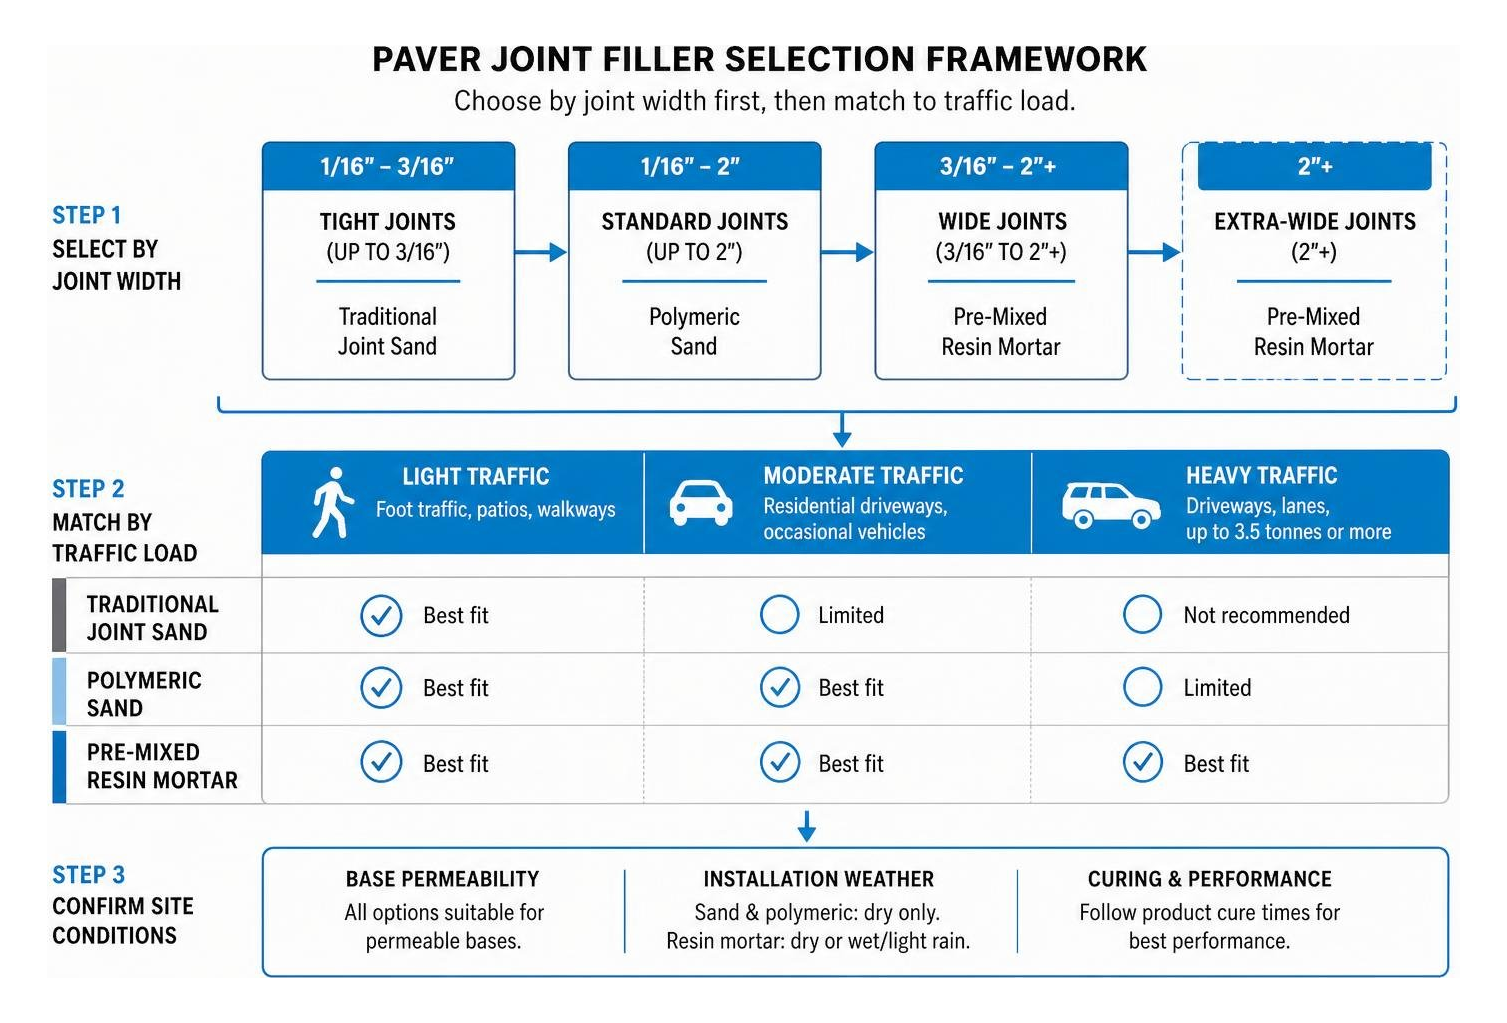
Thorough paver installation preparation ensures that the sub-base, bedding layer, and edge restraints are sound before you commit to a specific joint filler.
Joint Width, Base Permeability, and Traffic Loads
Joint width plays a major role in filler selection:
- Tight Joints (1/16″ to 1/4″): High-flow, fine-grade polymeric sands work best here, penetrating deep into narrow gaps without bridging prematurely. A 50 lb bag of high-performance sand typically covers 50 to 75 square feet on thin clay brick joints.
- Wide Joints (1/4″ to 2″): Coarse-aggregate polymeric sands or vacuum-packed resin mortars prevent slumping and cracking across wider spans. Coverage for wider joints drops to approximately 20 to 35 square feet per 50 lb bag.
- Base Drainage & Permeability: If your patio is built on a free-draining, open-graded aggregate base designed to filter runoff, choose a permanently permeable resin mortar or specialized permeable filler to prevent surface pooling. Ensure your base maintains at least a 2% slope for positive water runoff away from adjacent foundations.
- Traffic Load Demands: For a heavy-duty custom paver driveway, high-density joint materials that handle torsional tire friction and vehicle loads without breaking down are essential. Commercial-grade formulas provide the load capacity required for high-stress zones.
Red Clay Bricks vs. Concrete Paver Considerations
Material composition determines how paver units interact with chemical binders. Understanding the differences outlined in our brick pavers vs concrete pavers comparison is vital when selecting a jointing strategy.
Concrete pavers are dense and molded with chamfered edges, making them well-suited for polymeric sand. In contrast, genuine fired red clay bricks are porous. When standard polymeric sand is activated on unsealed clay brick, the fine polymer binders can wick directly into the microscopic pores of the clay. Once cured, this leaves behind a milky white, permanent polymer haze that is difficult to remove without damaging the brick face.
For unsealed red clay bricks, we recommend using pure silica sand stabilized with a dedicated liquid joint stabilizer, or utilizing a non-staining, oxygen-cured resin mortar applied over a saturated, pre-wet surface.
Preparing Your Paver Surface and Joints for Application
Proper preparation accounts for 80% of a joint filler’s success. Applying polymeric material over a dirty, damp, or structurally compromised base almost guarantees failure.
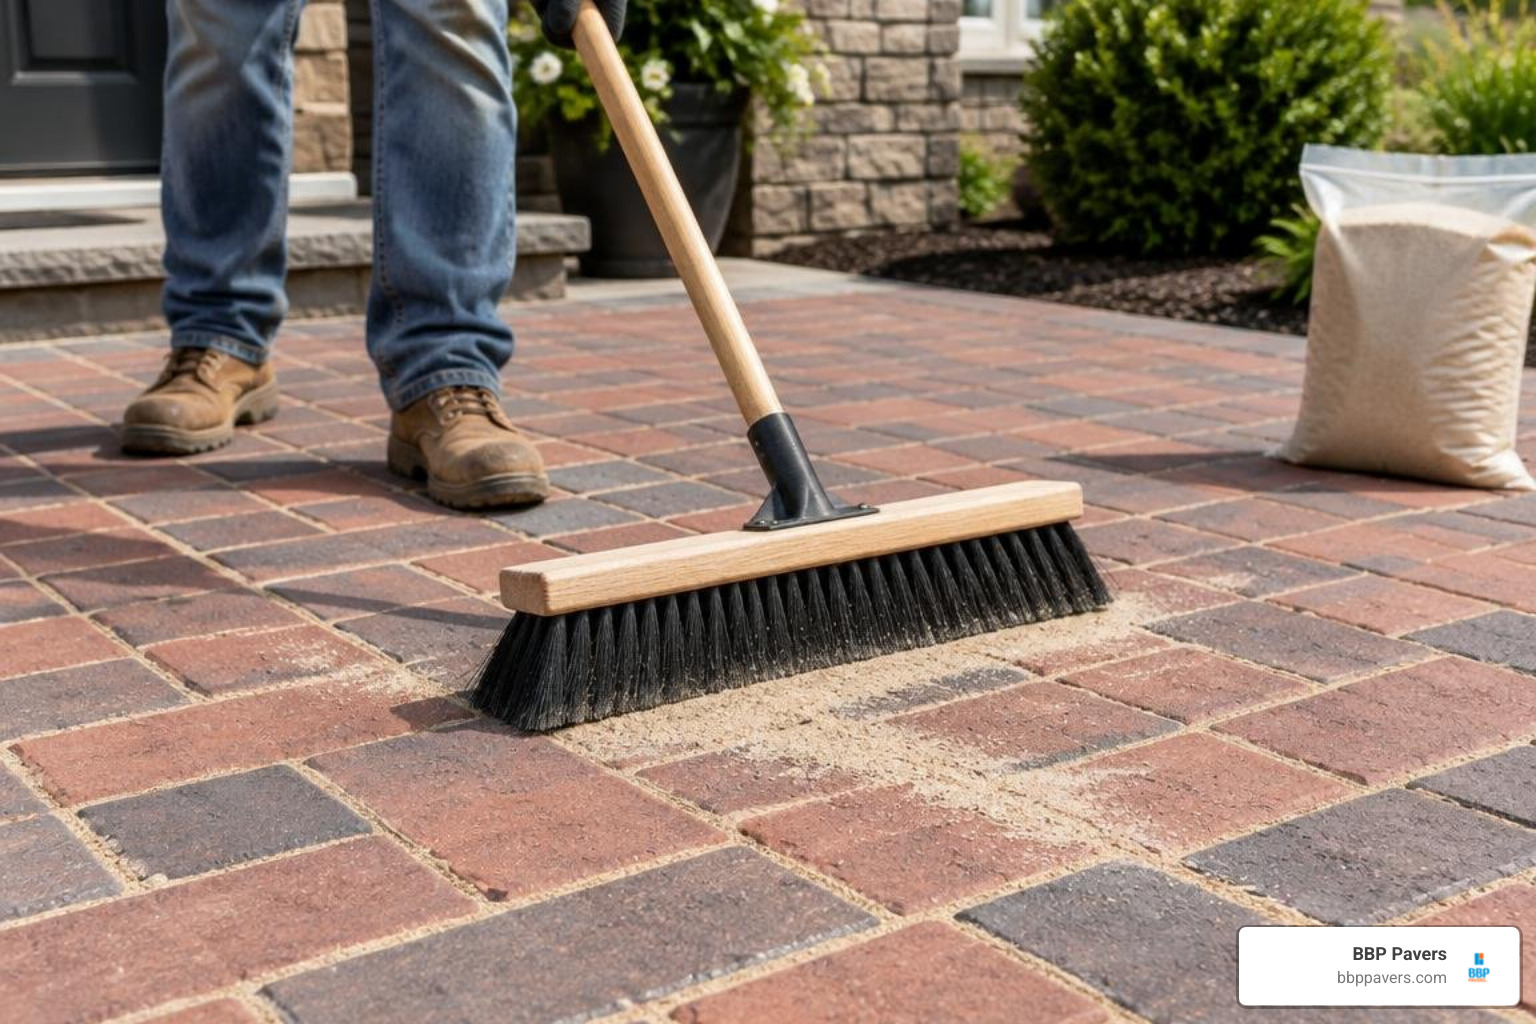
Before starting, check your local forecast. You will need a continuous window of 24 to 48 hours of dry weather with ambient temperatures remaining above 50°F (10°C) for proper curing. If the pavers have absorbed oil, grease, or organic tannins, follow our guide on how to remove paver stains prior to joint filling.
Removing Old Sand, Weeds, and Debris
When replacing deteriorated joint material on an existing hardscape:
- Clear Existing Gaps: Use a pressure washer equipped with a 25-degree or turbo nozzle, holding the wand at a 45-degree angle to blast away old sand, moss, and weeds. Alternatively, use a specialized joint cleanout hook for smaller areas.
- Achieve Proper Depth: Excavate joints to a minimum depth of 1 inch, or at least two-thirds of the total paver thickness. Polymeric sand requires sufficient mass to form a stable, cohesive bond; shallow layers of 1/4″ to 1/2″ will crack and flake out within weeks.
- Dry Thoroughly: Allow the paver system to dry completely for at least 48 to 72 hours after washing. Moisture trapped deep within the joints will activate polymeric sand prematurely, clogging the gap before it settles fully.
Essential Tools for Jointing Projects
Gather all necessary equipment before opening your joint material:
- Push Broom & Soft-Bristle Fine Broom: For working filler across the field and performing the final diagonal sweep.
- Plate Compactor with Protective Pad: Essential for vibrating sand into the bottom of the joints. For fragile pavers, use a rubber mat beneath the steel plate.
- Low-Throttle Leaf Blower: For clearing fine polymer dust and loose sand grains from paver chamfers prior to watering.
- Garden Hose with Multi-Pattern Shower Nozzle: To provide a gentle, controlled mist for activation.
- Personal Protective Equipment (PPE): Safety glasses, heavy-duty gloves, and a NIOSH-approved respirator mask to protect against airborne respirable crystalline silica dust.
Step-by-Step Guide to Applying and Activating Polymeric Sand
Applying polymeric sand requires precision. Once moisture touches the binder, the chemical clock starts ticking.
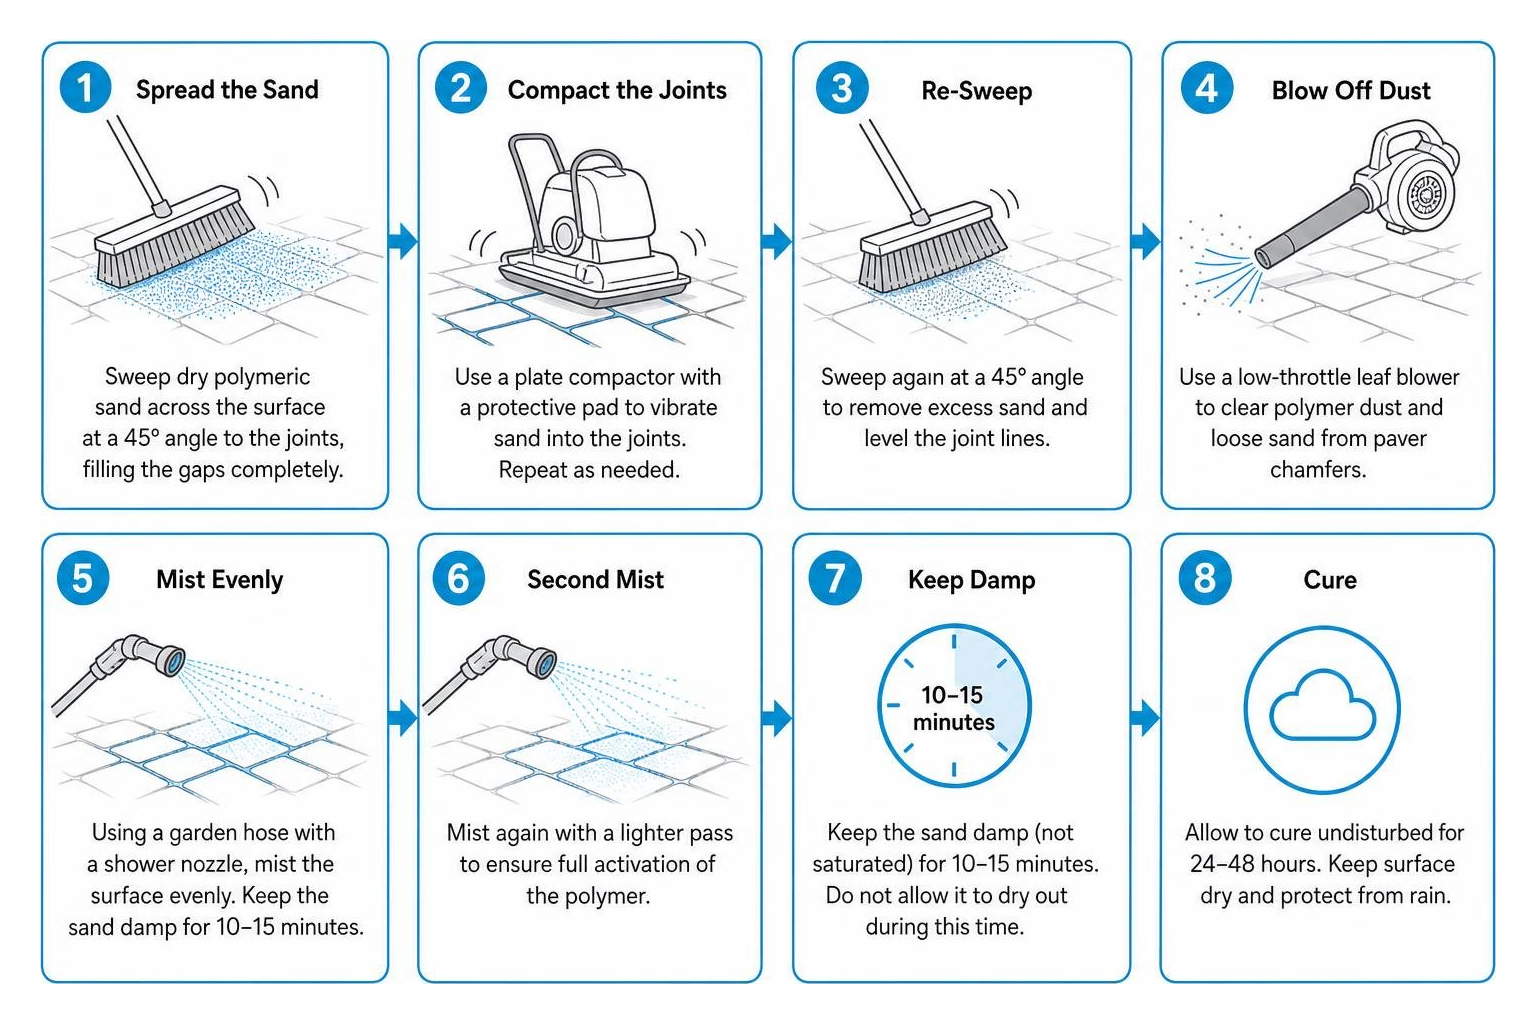
If you are laying a brand-new patio, ensure your structural base is fully installed according to the guidelines in how to lay pavers before starting the joint filling process.
Sweeping, Compacting, and Dust Removal
- Spread the Sand: Pour dry polymeric sand evenly over dry pavers. Using a stiff push broom, sweep the sand across the surface at a 45-degree angle to the joints, filling the gaps completely.
- Vibrate and Compact: Run a plate compactor equipped with a rubber protective pad over the entire paved area. The mechanical vibration forces the sand grains to settle, eliminating subterranean voids and air pockets. You will notice the joint levels drop significantly as the material consolidates.
- Top Up and Re-Sweep: Spread additional sand across the surface and sweep it into the compacted joints until they are filled to roughly 1/8 inch below the paver chamfer or top edge. Leaving this slight recess prevents traffic from kicking the top layer loose.
- Blow Off Excess Dust: Use a leaf blower on low throttle, held nearly parallel to the surface, to blow all residual sand particles and binder dust off the face of the pavers. Any dust left behind will fuse to the paver surface once wetted, causing hazing.
Water Activation and Proper Curing Times
Watering must be done carefully. Too little water fails to activate the lower polymers, while excessive water washes the binders out of the top joint layer.
- First Mist: Set your hose nozzle to the “Shower” or “Mist” setting. Spray a section (roughly 200 sq. ft.) from top to bottom for 15 to 20 seconds, allowing the water to soak in without pooling.
- Second Application: Wait 5 to 10 minutes for the initial moisture to penetrate downward. Apply a second, slightly heavier shower pass to saturate the joint completely down to the bedding layer.
- Check Depth: Check a discreet joint with a small screwdriver or putty knife to ensure moisture has penetrated the full depth of the sand. If the bottom remains dry, apply a light third pass.
- Curing Timeline:
- 4 to 6 Hours: Light foot traffic allowed (surface crust begins to firm).
- 24 Hours: Safe for full pedestrian traffic; product achieves initial structural set.
- 72 Hours: Safe for vehicle traffic on driveways.
- 28 to 30 Days: Complete chemical cure achieved; the surface is now fully ready for how to seal pavers.
Troubleshooting, Maintenance, and Joint Restoration
Even well-installed hardscapes encounter environmental stress over time. Understanding how to diagnose and resolve joint issues helps protect your investment.

Diagnosing Cracking, Washout, and Hazing
- Polymer Washout: Occurs when heavy rain hits fresh joints before the 12-hour initial set, or when over-watering floods the polymers out of the sand matrix. The joint feels crumbly and washes away easily.
- Top-Layer Cracking: Often caused by filling joints in shallow depths (under 1 inch), failing to mechanically compact the sand, or installing over an unstable, flexing base.
- Polymeric Haze: A milky, white film across the paver face caused by wetting residual polymer dust that was not swept or blown clean before activation. Light haze can be cleaned with a mixture of vinegar and water with a stiff brush; heavy hazing requires specialized acid-free polymeric haze cleaners or hot-water pressure washing.
Maintaining and Repairing Brick Paver Joint Filler Over Time
Regular maintenance keeps joint filler intact and functional:
- Routine Cleaning: Seasonally remove leaf debris, dirt, and organic build-up using a low-pressure wash or soft-bristle broom to prevent organic staining.
- Spot Joint Repair: If an isolated section cracks due to settling, scrape out the damaged joint material to a depth of 1 to 1.5 inches. Ensure the gap is bone-dry, pour in fresh matching polymeric sand, tamp it down firmly with a margin trowel, blow away surface dust, and mist to activate.
- Long-Term Longevity: Quality polymeric installations typically last 5 to 10 years before requiring top-up work or joint re-sand services. To better understand how simple modular fixes compare to concrete slab maintenance, review our breakdown on paver stones long term repairability.
Frequently Asked Questions About Paver Joint Fillers
Can polymeric sand be safely used on red clay bricks?
Polymeric sand is generally not recommended for unsealed red clay bricks. The porous nature of fired clay draws in fine polymer binders during the wetting phase, causing stubborn white hazing and surface discoloration. For red clay brick hardscapes, standard ASTM C144 silica sand paired with a breathable liquid joint stabilizing sealer—or an oxygen-curing, pre-wetted resin mortar—provides a safer, non-staining result.
How long does polymeric sand take to cure before rain or traffic?
Polymeric sand requires a rain-free window of at least 12 to 24 hours immediately following installation. It supports light foot traffic within 4 to 6 hours, full pedestrian traffic after 24 hours, and standard vehicular traffic after 72 hours. Cold temperatures (below 50°F) or high humidity can extend these curing timelines.
How do you fix failing joint filler without pulling up the pavers?
You do not need to pull up settled pavers to fix failing joint filler. Use a pressure washer at a 45-degree angle to blast away the degraded, cracked sand down to a depth of at least 1 to 1.5 inches. Allow the pavers and bedding layer to dry completely for 48 to 72 hours. Once bone-dry, sweep fresh polymeric sand into the clean joints, compact thoroughly, blow off any dust, and activate with a fine water mist.
Conclusion
Choosing and applying the right joint filler is one of the most important steps in any hardscaping project. Whether you choose a high-performance polymeric sand for a concrete paver patio or an oxygen-cured resin mortar for a permeable driveway, proper preparation, thorough compaction, clean dust removal, and careful water activation ensure your hardscape remains weed-free, structurally stable, and beautiful for years to come.
If you are planning a hardscape upgrade in the San Francisco Bay Area, our team at BBP Pavers brings over 20 years of local expertise to every design and installation. From custom paver patios and driveways to complete outdoor living spaces, we use premium materials backed by a safety-first process and a 100% satisfaction guarantee. Contact us today for a free design consultation and quote, or explore our complete guide to brick pavers to start planning your next landscape project.