How to Seal Pavers: A Comprehensive Guide
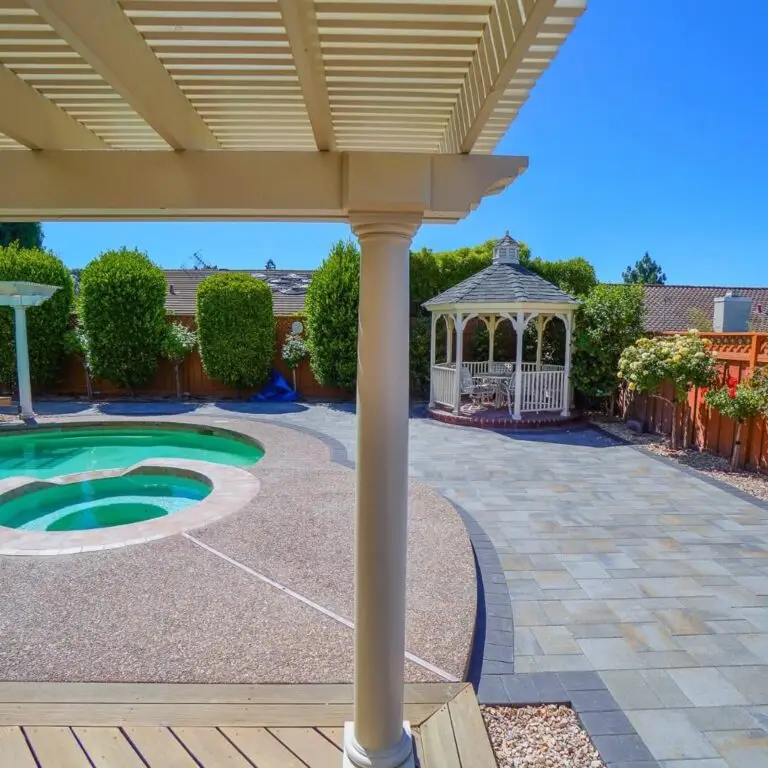
Maintaining the enduring beauty of your paver installation requires proactive measures. Factors like weather, weeds, and regular usage can diminish the charm of your pavers and curtail their longevity. Wondering how to preserve your investment? The solution is straightforward: paver sealing.
Why Seal Your Pavers?
If you’ve ever asked yourself, “Do pavers need to be sealed?” you’ve already taken the first step toward proper paver maintenance. Sealing your pavers helps to enhance their color, prevents staining, reduces weed growth, and provides a barrier against the elements. By sealing your pavers, you protect your investment, increase their lifespan, and keep them looking new for longer.
Understanding the Types of Paver Sealers
Before we dive into the ‘how,’ we need to address the ‘what.’ Paver sealers can vary greatly, and it’s important to understand these differences to choose the right one for your needs.
Glossy vs. Matte Finish Sealers:
It can come with either a glossy or matte finish. A glossy sealer gives your pavers a high-gloss, wet look, bringing out the colors of the pavers and giving your hardscape a ‘pop’ that can be quite eye-catching. Meanwhile, a matte sealer offers a more natural look, as if the pavers are freshly rained on.
Water-Based vs. Solvent-Based Sealers:
In terms of composition, sealers come in water-based and solvent-based varieties. Water-based sealers are less harmful to the environment, easier to clean up, and less likely to entrap moisture, which can lead to a cloudy appearance. Solvent-based sealers, while having a stronger odor, provide a richer color enhancement and are often more durable.
Preparing Your Pavers for Sealing
Just like any painting job, the most critical part of the work is in the prep. Sealing pavers is no different. A properly cleaned and prepared surface is essential for the sealer to adhere correctly and last longer.
Cleaning Pavers before Sealing:
Before you start sealing, make sure to clean the pavers thoroughly. This is an essential step because any dirt, stains, or existing sealer can prevent the new sealer from adhering correctly. You might need to use a pressure washer or a paver cleaner to remove stubborn dirt and grime.
Sanding Pavers before Sealing:
Once your pavers are squeaky clean, it’s time to add sand to the joints. The sand acts as a stabilizer, helping to keep the pavers in place, reducing weed growth, and inhibiting pests like ants. It’s important to use a special kind of sand known as joint or paver sand for this purpose.
Applying the Sealer
Step-by-Step Process:
Applying the sealer is straightforward if you follow the correct steps. But remember, it’s not a race. Take your time to apply the sealer correctly.
Coverage of Sealer:
When it comes to applying the sealer, less is more. A thin, even layer will do the job. Use a sprayer for large areas, while a roller or a brush can be better for smaller or more intricate areas. Always remember to work in manageable sections and to be mindful of the weather conditions. You don’t want a sudden rain shower to wash away your hard work!
Drying and Curing Time:
After you’ve applied the sealer, it’s a waiting game. Drying time can vary based on the type of sealer used, but in most cases, you should allow at least 24 hours before walking or driving on the sealed surface.
Tips for a Successful Sealing Process
Now that we’ve covered the basics of the paver sealing process, let’s dive into some additional tips and tricks to ensure your paver sealing is a resounding success.
Timing the Sealing:
One critical factor when sealing pavers is timing. Check the weather forecast before you start. Ideal sealing conditions are a dry, warm day with low humidity. This weather allows the sealer to dry and cure properly. If it’s too cold, the sealer may not adhere well, and if it’s too humid, the sealer may not dry correctly.
Test a Small Area:
Avoid Overaplication:
First Before you go all out and start sealing your entire patio or driveway, it’s a good idea to test the sealer on a small, inconspicuous area first. This test will let you see how the sealer interacts with your pavers and give you an idea of the final look.
While it might be tempting to apply a thick layer of sealer thinking it will offer more protection, the opposite is true. Over application can lead to issues like a cloudy or milky appearance, flaking, or a slippery surface. Remember, less is more when it comes to paver sealer.
Pay Attention to Joint Sand:
Don’t overlook the joint sand when sealing your pavers. The sand plays a crucial role in paver stabilization and should be adequately covered during the sealing process. Some sealers are specifically designed to harden the sand and further improve its stabilizing and weed-preventive properties.
Long-Term Maintenance and Reapplication of Sealer
With the sealing done, it’s time to think about long-term maintenance.
Sealer Reapplication:
Depending on the type of sealer used and the wear and tear on your pavers, resealing might be needed every 2-5 years. This will not only replenish the protective layer but also revitalize the look of your pavers.
Regular Cleaning:
Regular cleaning of your pavers can go a long way towards preserving their look and prolonging the life of the sealer. Use a gentle cleaner and avoid power washing, which can damage the sealer.
DIY vs. Professional Paver Sealing
When it comes to sealing your pavers, one key decision you’ll face is whether to take the DIY route or hire professionals. There are pros and cons to each approach, and the best choice often depends on your circumstances, such as your skill level, the size and complexity of your project, and your budget.
The Case for DIY Paver Sealing: Going the DIY route can be an attractive option if you’re queen on getting your hands dirty and have some experience with similar projects. DIY paver sealing can save you the labor costs associated with hiring a professional, which can be significant. Moreover, doing it yourself can provide a certain level of satisfaction, knowing you’ve taken an active role in maintaining your property. You can also control every aspect of the project, from choosing the exact sealer you want to deciding when to do the work.
Why You Might Opt for Professional Paver Sealing: While DIY can be rewarding, professional paver sealing offers its own set of benefits. Professionals come equipped with industry knowledge, expertise, and tools that the average homeowner might not possess. Professionals understand how different sealers interact with various types of pavers, and they can advise you on the best sealer for your specific pavers. They also know how to apply the sealer correctly to avoid common pitfalls like uneven application, bubbles, and poor adhesion. Another significant benefit of hiring professionals is the time saved. Sealing a paver installation, particularly a large one, can be a time-consuming task. Professionals can often complete the job much quicker, allowing you to enjoy your beautifully sealed pavers sooner.
The Bottom Line: In the end, the decision between DIY and professional paver sealing comes down to a balance between cost, convenience, and confidence in your ability to do the job well. Remember, sealing your pavers is an investment in the longevity and beauty of your hardscape. Whether you choose to do it yourself or hire professionals, the most important thing is that it’s done correctly.
Common Mistakes to Avoid
When Sealing Pavers To wrap up our guide, let’s go over some common mistakes that homeowners make when sealing pavers – so you can avoid them!
Rushing the Process: Rushing any part of the process – from cleaning, to sanding, to applying the sealer – can result in a less than satisfactory outcome. Remember, patience is key!
Using the Wrong Type of Sealer: Remember that different types of pavers might need different types of sealers. Always do your research to ensure you’re using the right product.
FAQs about Paver Sealing
Do pavers need to be sealed?
Yes, sealing pavers is highly recommended. It protects your pavers from the elements, prevents stains, enhances their color, and can even prevent weed growth between the paver joints. Unsealed pavers are more vulnerable to fading, stain penetration, and weed infestation.
What is the best thing to seal pavers with?
The best sealer for your pavers depends on your specific needs and preferences. If you want a glossy, dramatic look and enhanced color, a glossy sealer might be your best bet. If you prefer a more natural look, a matte finish sealer would be a better choice. Also, water-based sealers are more environmentally friendly, while solvent-based sealers often provide a more durable finish.
How do you prepare pavers before sealing?
Preparation is crucial for a successful paver sealing process. Start by thoroughly cleaning your pavers to remove dirt, grime, and any existing sealer. You can use a power washer for this, but be careful not to dislodge the joint sand. After cleaning, let the pavers dry for at least 24 hours. Finally, replenish the joint sand, if necessary, before you start sealing.
Do I need to sand pavers before sealing?
You don’t necessarily need to sand the pavers, but you do need to check and replenish the joint sand between the pavers. The joint sand plays a crucial role in paver stabilization and should be at the correct level (usually about 1/8 inch below the paver edge) before sealing.
Conclusion
Sealing your pavers is a worthwhile investment. By doing so, you protect your hardscape, maintain its beauty, and prolong its lifespan. Whether you choose to do it yourself or hire professionals, you now have the knowledge to make an informed decision.