Top Stone Edging Options Every Homeowner Should Know

Stone Edging Options That Add Lasting Definition
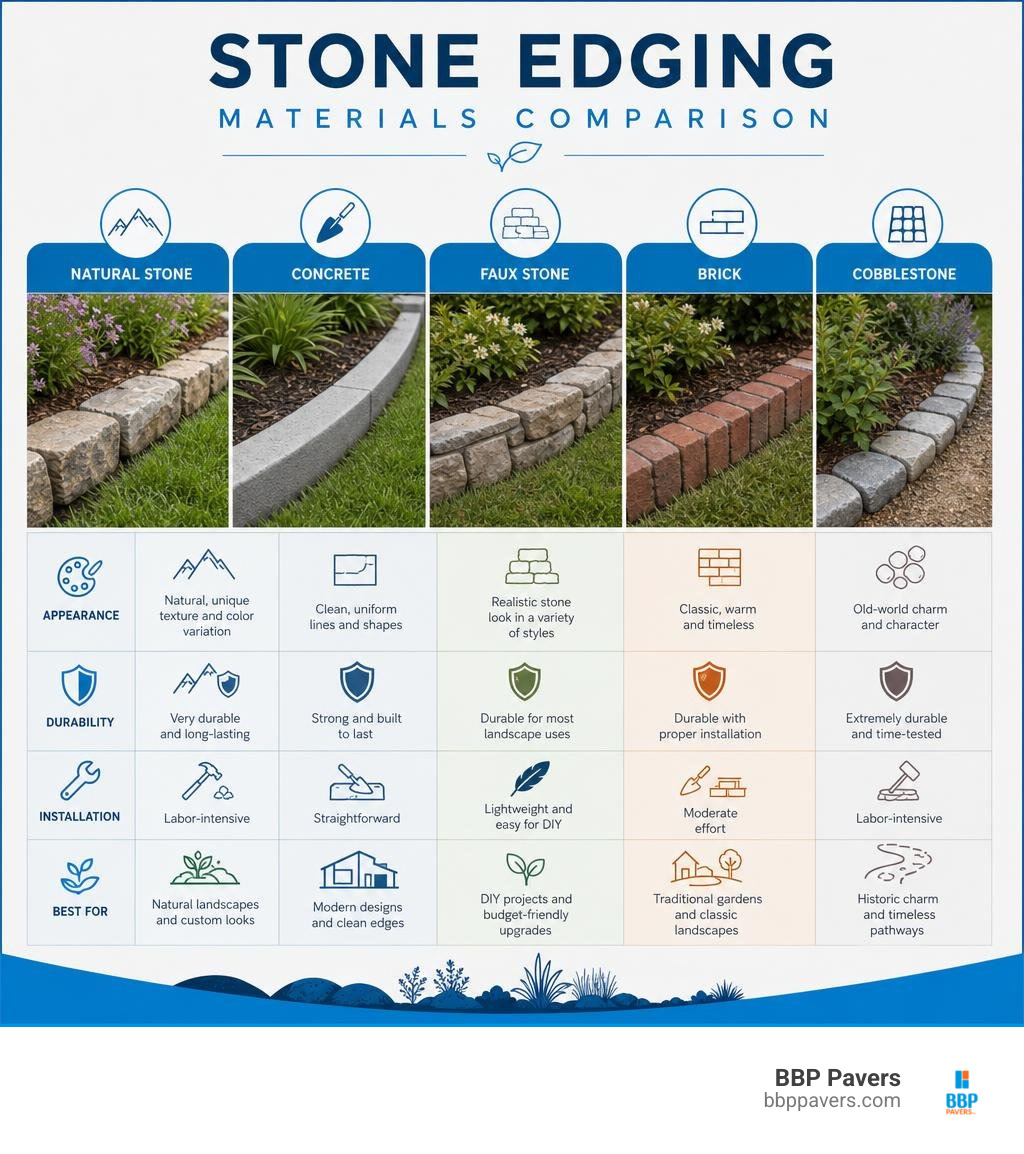
The best stone edging options depend on the look, budget, and job you need the border to do. Natural stone brings unique texture, concrete edging offers clean shapes and strong durability, faux stone systems are lighter and simpler for DIY installation, and brick or cobblestone suits classic paths and traditional gardens.
Stone edging does more than make a bed look finished. It creates a clear boundary between lawn, mulch, pavers, and planting areas. A well-set border can help hold mulch and soil in place, slow grass spread, reduce weed intrusion, and protect the edge of a driveway, patio, or walkway from a messy transition.
For Bay Area homeowners, the right material should also match the architecture of the home and existing hardscape. Smooth concrete or granite can suit a modern paver patio. Irregular fieldstone feels more natural around relaxed garden beds. Brick and cobblestone add warmth to older or more formal landscapes.
This guide compares the leading choices so you can find an edging solution that looks intentional today and stays stable for years.
Popular Stone Edging Options by Material and Style
Choosing the right landscape border comes down to balancing structural needs with your outdoor design style. Whether you are aiming for a sleek contemporary patio border or a loose, cottage-style perennial garden, the material you pick sets the tone for your whole yard.
Different stones perform uniquely under daily wear, foot traffic, and changing weather conditions. Evaluating their material composition, long-term durability, and aesthetic fit ensures your investment remains structurally sound and visually striking for decades.
Natural Stone Edging Options: Granite, Sandstone, and Fieldstone
Natural stone remains the gold standard for landscape borders that need timeless beauty and authentic geological character. Because every quarry yields different mineral formations, no two pieces are identical.
- Granite: Granite is one of the hardest, densest stones available. It resists heavy impact from lawn equipment, does not absorb significant moisture, and handles harsh weathering without cracking. Cut granite blocks provide sharp, formal edges that look exceptional framing clean driveway perimeters and contemporary garden lines.
- Sandstone: Offering earthy tans, soft reds, and warm buff tones, sandstone brings a relaxed, organic feel to garden beds. Sandstone edgers are softer than granite, making them easier to shape on-site, though they benefit from occasional sealing in areas exposed to continuous moisture.
- Fieldstone: Gathered from surface deposits rather than quarried, fieldstone rocks feature rounded shapes, weathered edges, and rustic charm. They create informal, organic borders around curved flower beds and native plant gardens.
When weighing structural hardscaping surfaces, evaluating natural stone vs porcelain pavers which is better can give you deeper insight into how natural quarry stones handle moisture, wear, and seasonal changes compared to manufactured alternatives.
Manufactured Concrete Stone Edging Options
Precast concrete edging stones combine structural engineering with designer aesthetics. Manufactured through wet-cast or dry-cast processes, these units offer uniform dimensions, integrated interlocking features, and incredible resistance to the freeze-thaw cycles that can shift looser stones.
Modern wet-cast options, such as the Raffinato Edge Smooth | Garden Edging Stones | Techo-Bloc, offer double-sided, ultra-smooth finishes engineered specifically for contemporary geometric architecture. These units resist de-icing salts, resist UV degradation, and provide crisp lines that pair naturally with concrete pavers.
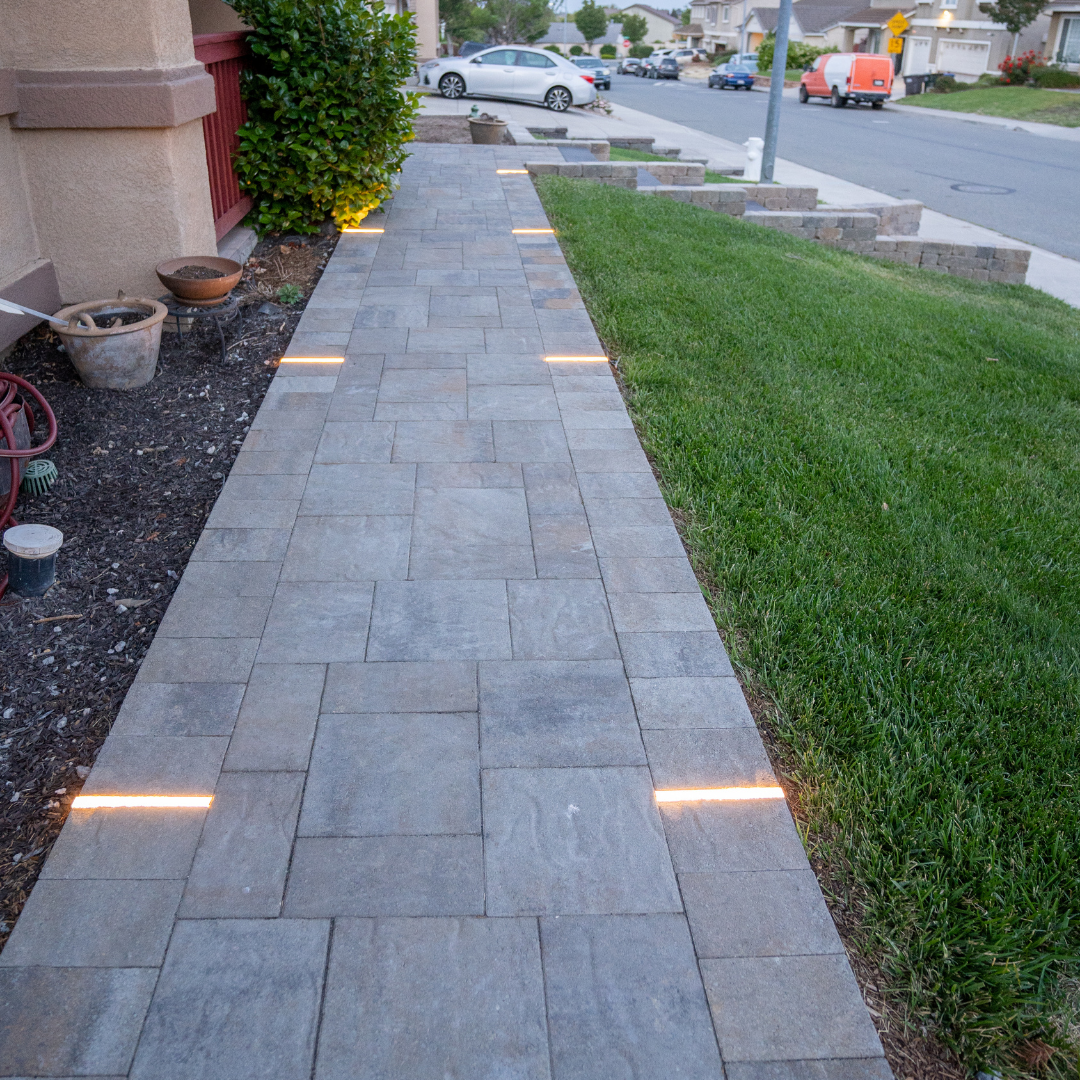
For a more textured, chiseled look, wet-cast products like the Röcka Edge | Garden Edging Stones | Techo-Bloc capture the bold face of hand-carved stone while maintaining consistent bed depths that make alignment simple. Commercial-grade engineered units like the Edgestone Edger – Outdoor Paver Border Solution provide beveled profiles that simplify curved layouts while holding up against heavy line trimmers.
Lightweight Faux Stone and Modular Polymer Systems
For homeowners looking for an accessible weekend project without the back strain of heavy masonry, lightweight composite and polymer edging systems have become an attractive alternative.
Engineered products like Beuta Blocks utilize durable, UV-stabilized low-density polyethylene (LDPE) molded from real stone profiles. These modular sections offer several distinct advantages:
- Fast Dig-Free Installation: Sections slide together using interlocking push-lock connectors and secure directly into the ground with heavy-duty landscape anchoring spikes.
- String-Trimmer Resilient: High-grade polymer does not chip, crack, or flake when struck by weed whacker lines.
- Weather Resistance: Modern synthetic systems withstand temperatures from -20°F to 140°F without fading, rotting, or becoming brittle.
While polymer systems lack the absolute structural mass of quarried granite, they offer an authentic stone look at a fraction of the weight, making them great for defining soft garden perimeters quickly.
Classic Brick and Cobblestone Edging
Brick and cobblestone provide classic historical elegance that pairs effortlessly with traditional, colonial, and craftsman architecture.
Fired-clay brick pavers deliver deep terracotta and crimson tones that do not fade over time. When installed in soldier courses (standing vertically) or sailor courses (laid flat lengthwise), brick establishes a tidy barrier that neatly retains mulch while creating a stable mowing strip.
Reclaimed or tumbled granite cobblestones (Belgian blocks) feature rounded tops and textured cleft faces. They excel along curved pathways, historic garden borders, and driveways where you want an old-world aesthetic.
When planning your layout, reading our brick pavers vs concrete pavers full comparison will help you choose the right material density and interlocking properties for your specific ground conditions.
Comparing Stone Edging Against Alternative Materials
Homeowners often weigh stone borders against thinner, flexible options like plastic strips, landscape timbers, or metal borders. While other materials may have lower upfront material costs, stone delivers unmatched longevity, wind resistance, and structural weight.
| Edging Material | Lifespan | Mower / Trimmer Resistance | Installation Effort | Best Garden Aesthetic | Approximate Cost |
|---|---|---|---|---|---|
| Natural Stone | 50+ Years | Excellent (Unaffected) | Moderate to High (Heavy Lifting) | Rustic, Natural, High-End Formal | High |
| Cast Concrete Units | 30+ Years | Excellent (Will Not Crack) | Moderate (Trench & Sand Base) | Modern, Clean, Geometric | Moderate to High |
| Faux Stone / Polymer | 15+ Years | Great (Slight Scuffing Possible) | Low (Push-Lock & Spikes) | Casual DIY, Curved Beds | Low to Moderate |
| Corten / Carbon Steel | 20+ Years | Good (Can Dent or Scuff) | Moderate (Hammer-in Stakes) | Minimalist, Contemporary | Moderate |
| Recycled Plastic | 3–7 Years | Poor (Easily Cut by Trimmers) | Low (Trench or Surface Spike) | Budget Garden Beds | Very Low |
| Landscape Timber | 5–10 Years | Fair (Subject to Rot & Insects) | Moderate (Drilling & Rebar) | Rustic, Raised Linear Beds | Low |
Thin plastic edging often warps when exposed to seasonal temperature shifts and becomes brittle under direct sun exposure. Wood eventually rots, absorbs water, and attracts subterranean pests.
Stone borders stay firmly in place, resist accidental strikes from mowers, and cleanly highlight the best plants to border your paver walkway without degrading over time.
Step-by-Step Installation: How to Lay Stone Edging
A long-lasting stone border relies on thorough base preparation. Even the highest-quality natural stone will sink, lean, or shift if placed directly on uncompacted topsoil.
Planning, Trench Depth, and Base Preparation
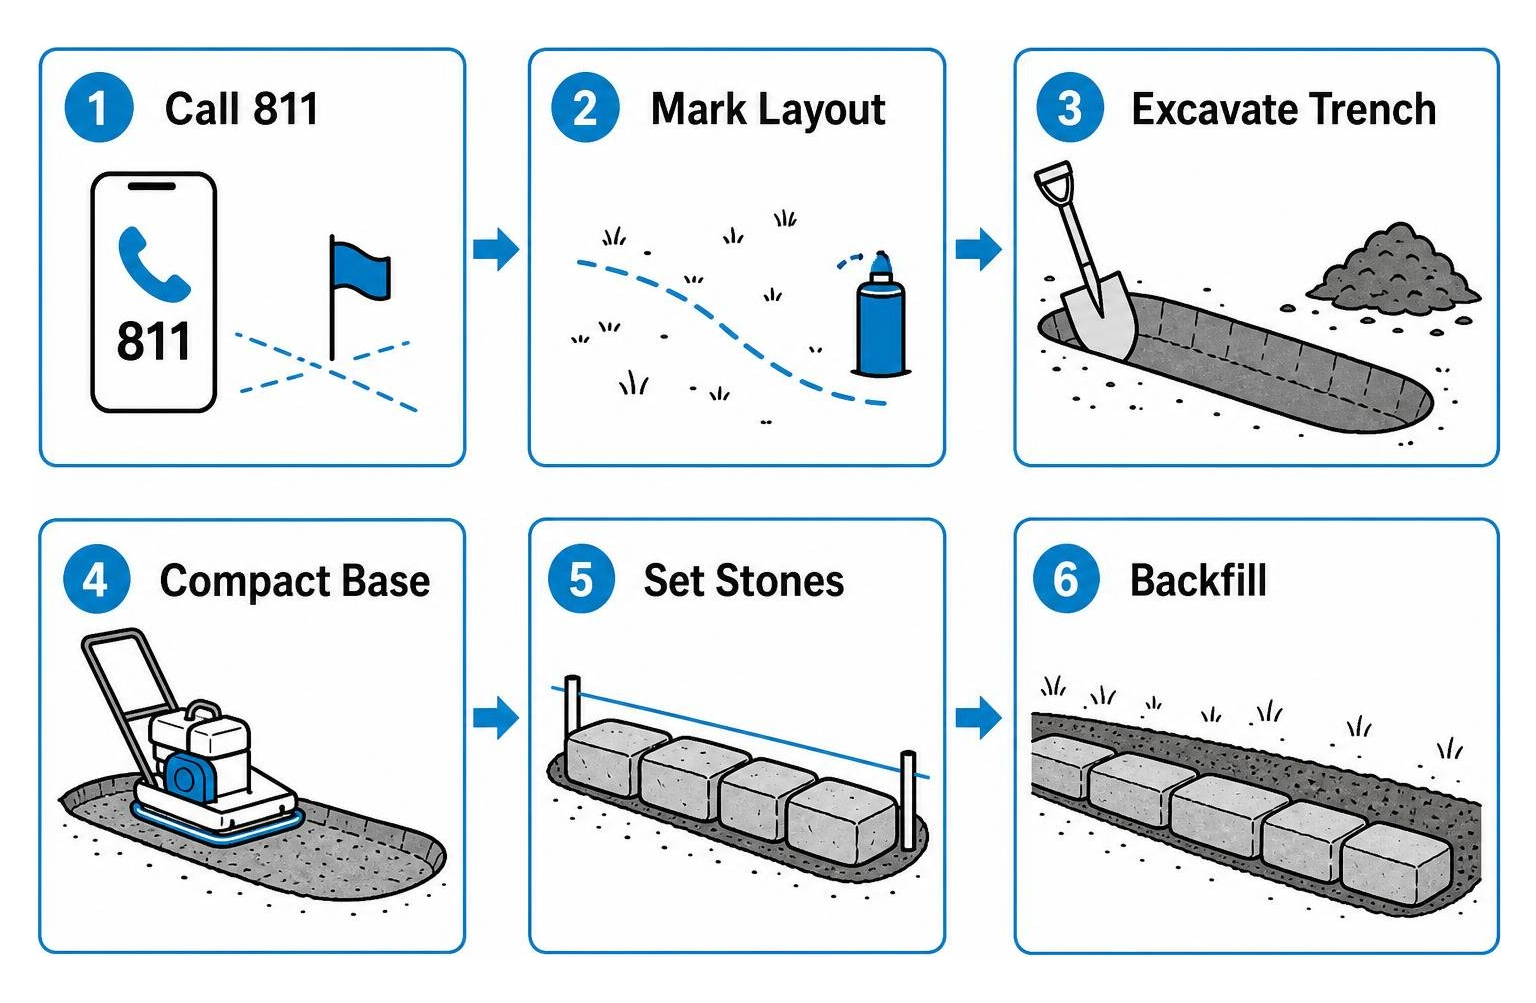
Before starting any excavation, always call 811 to locate underground utility lines. Once your lines are marked, lay out your proposed border using marking paint, a flexible garden hose, or mason line.
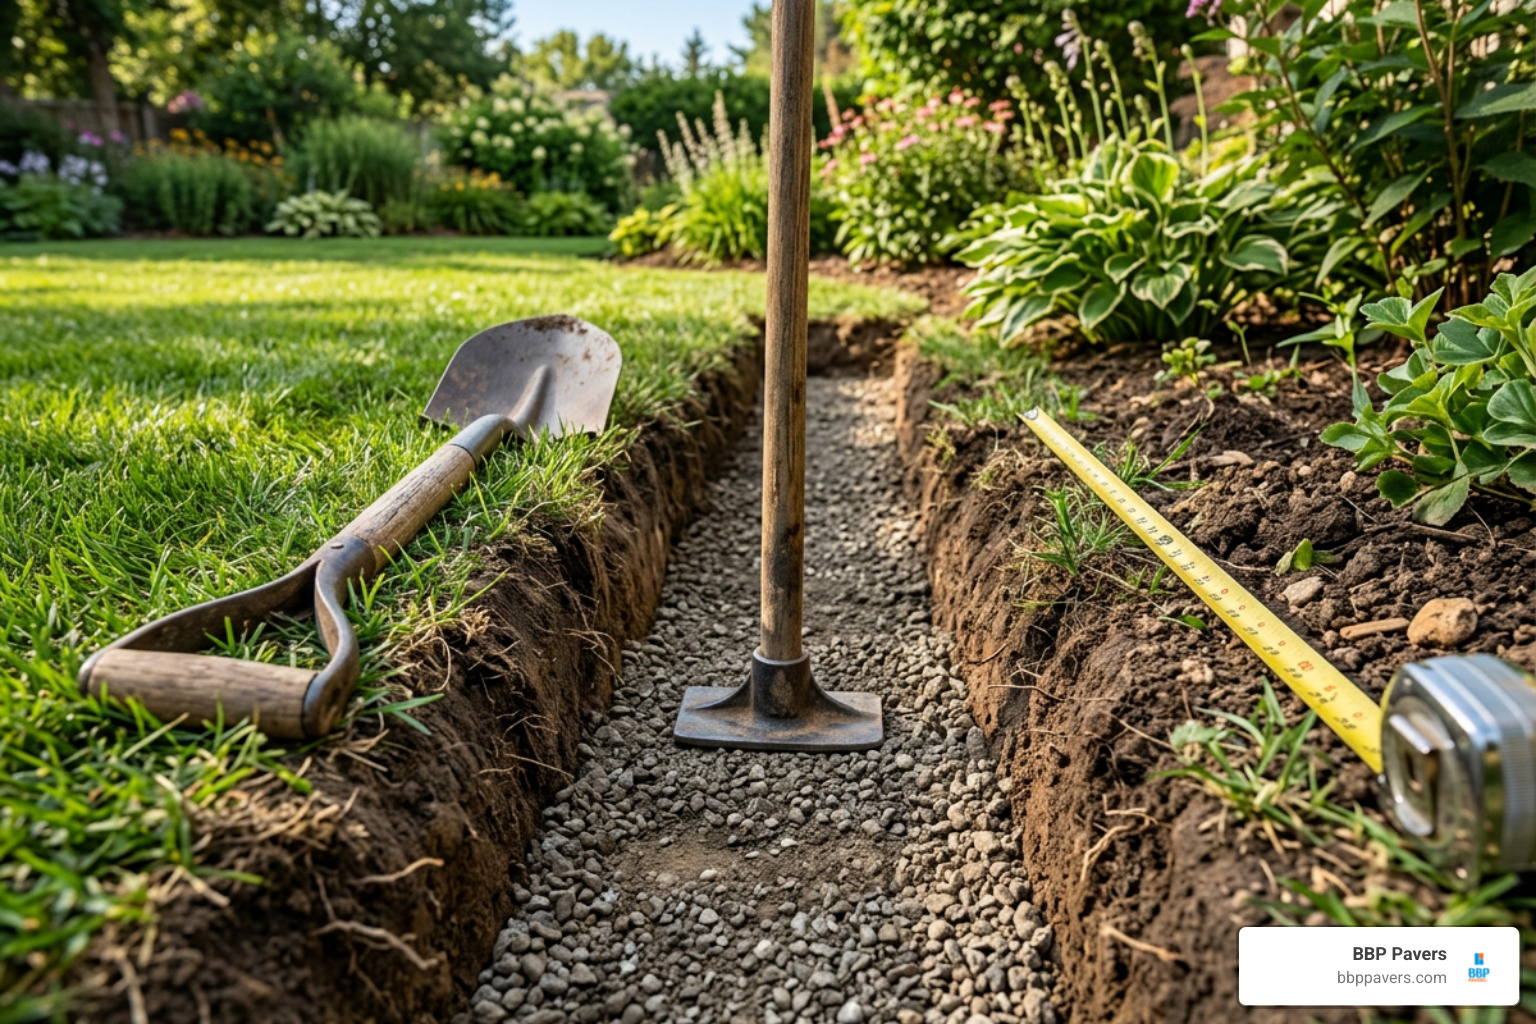
- Trench Excavation: Dig a shallow trench along your marked border line. The trench should be approximately 2 to 3 inches wider than your stones. Aim for a depth that accommodates a 2-inch compacted base while allowing roughly one-third of the stone’s total height to sit below the finished soil grade.
- Subgrade Compaction: Tamp the native soil inside the trench using a hand tamper to eliminate loose air pockets that could cause settling.
- Base Layer: Add 1 to 2 inches of crushed aggregate (paver base) or leveling sand. Screed the base smooth, moisten lightly, and tamp down firmly. Adding a layer of non-woven geotextile landscape fabric beneath the base aggregate prevents soil migration and improves drainage.
Following the core fundamentals of how to install pavers ensures your edging foundation remains level and stable throughout wet and dry seasons.
Setting Stones and Handling Curved Borders
Once your base is prepared, begin laying your edging stones from one end of the trench to the other.
- Set and Level: Place your first stone onto the compacted sand bed. Use a rubber mallet to gently tap the stone into position. Check alignment with a long spirit level for straight runs or a compact torpedo level for individual stones along curved layouts.
- Maintaining Consistent Depth: Keep a continuous mason line suspended along the top edge of your run to maintain a uniform border height.
- Navigating Curves: When creating curved garden borders, place rectangular stones end-to-end in sweeping arcs. For tight curves, manufactured tapered blocks like StoneLedge™ – Newline Hardscapes feature angled side profiles that fit together snugly without leaving wide, awkward wedge gaps. If you are using natural granite or concrete pavers, make clean radial miter cuts using a wet tile saw equipped with a diamond masonry blade.
- Securing the Joints: Once stones are positioned, backfill along the outer garden edge with rich soil or mulch, and backfill the turf side with native soil. For paver-to-paver borders, sweep polymeric sand into the stone joints and mist with water to lock the blocks together and block weed seeds.
Mastering how to lay pavers gives you the confidence to tackle clean corners, uniform joints, and tight curve transitions without hiring out basic masonry tasks.
Garden Walls vs. Garden Edging: Knowing the Difference
Homeowners frequently ask whether they need landscape edging or a full retaining wall system. While both use stone masonry products, their structural purposes are completely different.
- Garden Edging: Landscape edging serves as a low-profile, decorative and functional separator. It typically stands 1 to 4 inches above the ground. Its primary role is defining borders, retaining thin mulch blankets, and stopping grass roots from creeping into flower beds. It does not support heavy lateral soil loads.
- Garden and Retaining Walls: A retaining wall is an engineered structural feature designed to hold back elevated slopes, prevent hillside erosion, and carve flat terraces into sloped yards. Structural walls often require deep buried footing courses, aggregate drainage backfill, perforated drain pipes, and geogrid soil reinforcement for builds over 2 feet high.

If your yard deals with uneven grade changes, soil washouts, or terraced garden beds, integrating structural retaining walls alongside your low-profile edging ensures your property remains safe and structurally stable.
Frequently Asked Questions About Stone Edging
How deep should edging stones be set in the ground?
Edging stones should generally follow the one-third rule: approximately one-third of the stone’s total height (or roughly 1.5 inches for a standard 4-inch-tall stone) should be set below the finished lawn grade. Setting the stone at this depth prevents it from tipping when bumped by lawnmower wheels, provides lateral resistance against shifting topsoil, and creates an effective physical barrier against shallow grass roots.
How do stone borders help with weed control and lawn erosion?
Stone borders solve two of the most frustrating landscaping challenges:
- Root and Weed Suppression: Grass spreads through surface runners (stolons) and shallow underground stems (rhizomes). A buried stone border acts as a solid physical barrier that blocks these creeping roots. Above ground, the stone holds back thick layers of wood mulch that block sunlight from reaching weed seeds.
- Erosion Control: During heavy seasonal downpours, bare garden beds can wash away onto adjacent concrete and turf. Stone borders keep topsoil, compost, and decorative rock securely in place, redirecting excess storm runoff toward your lawn’s primary drainage channels.
For properties with sloping accessways, adding specialized driveway edging concord ca prevents high-volume storm runoff from eroding base gravel and washing mulch directly across vehicle paths.
What are the best practices for maintaining stone landscape borders?
Stone landscape borders are exceptionally low-maintenance, but simple periodic care will keep them looking pristine:
- Low-Pressure Rinsing: Wash away organic soil build-up, fallen leaves, and moss using a standard garden hose nozzle. Avoid point-blank high-pressure power washing directly at unmortared sand joints, which can dislodge stabilizing sand.
- Joint Sand Replenishment: If using sand-set concrete or cobblestone edgers, inspect the joints every spring. Top off any eroded joints with fresh polymeric sand to keep weeds from establishing a foothold between the stones.
- Resetting Settled Blocks: If a stone shifts over time due to nearby tree roots or ground settlement, lift the single stone, level the sand base beneath it with a trowel, tamp it down, and tap the stone back into line with a rubber mallet.
Conclusion
Upgrading your landscape with stone edging transforms plain garden beds into structured, architectural features that improve your home’s curb appeal. From the rugged texture of natural granite and fieldstone to the clean geometry of modern wet-cast concrete systems, stone edging delivers durability, weed defense, and erosion control that thin plastic or wood simply cannot match.
At BBP Pavers, we bring over 20 years of local Bay Area hardscape expertise to every project. Whether you are installing a custom paver walkway, an elegant driveway apron, or a complete outdoor living space, our safety-first process and 100% satisfaction guarantee ensure your property looks stunning for decades.
Explore our complete guide to edging stone options landscaping to start planning your outdoor transformation, or contact our team today for a free design consultation and quote.